
The complete guide
Drain Hose Extension Buyer's Guide, Sizing, Fitting and Avoiding Leaks
The problem nobody mentions until moving day
You slide the washing machine into its new spot, plug it in, reach for the drain hose and come up about half a metre short. Every laundry renovation, every kitchen reshuffle, every move into a flat where the standpipe is on the wrong wall ends in the same place. The machine gets pushed as close as it will go, the hose takes a hard bend behind it, and you hope for the best.
Hoping for the best is where the trouble starts. A drain hose that is stretched tight pulls at the joint. A drain hose that is folded into a tight corner slows the pump and leaves dirty water sitting in the line. Both problems are quiet at first and then suddenly are not, usually at the worst possible moment with a full load of washing on the floor.
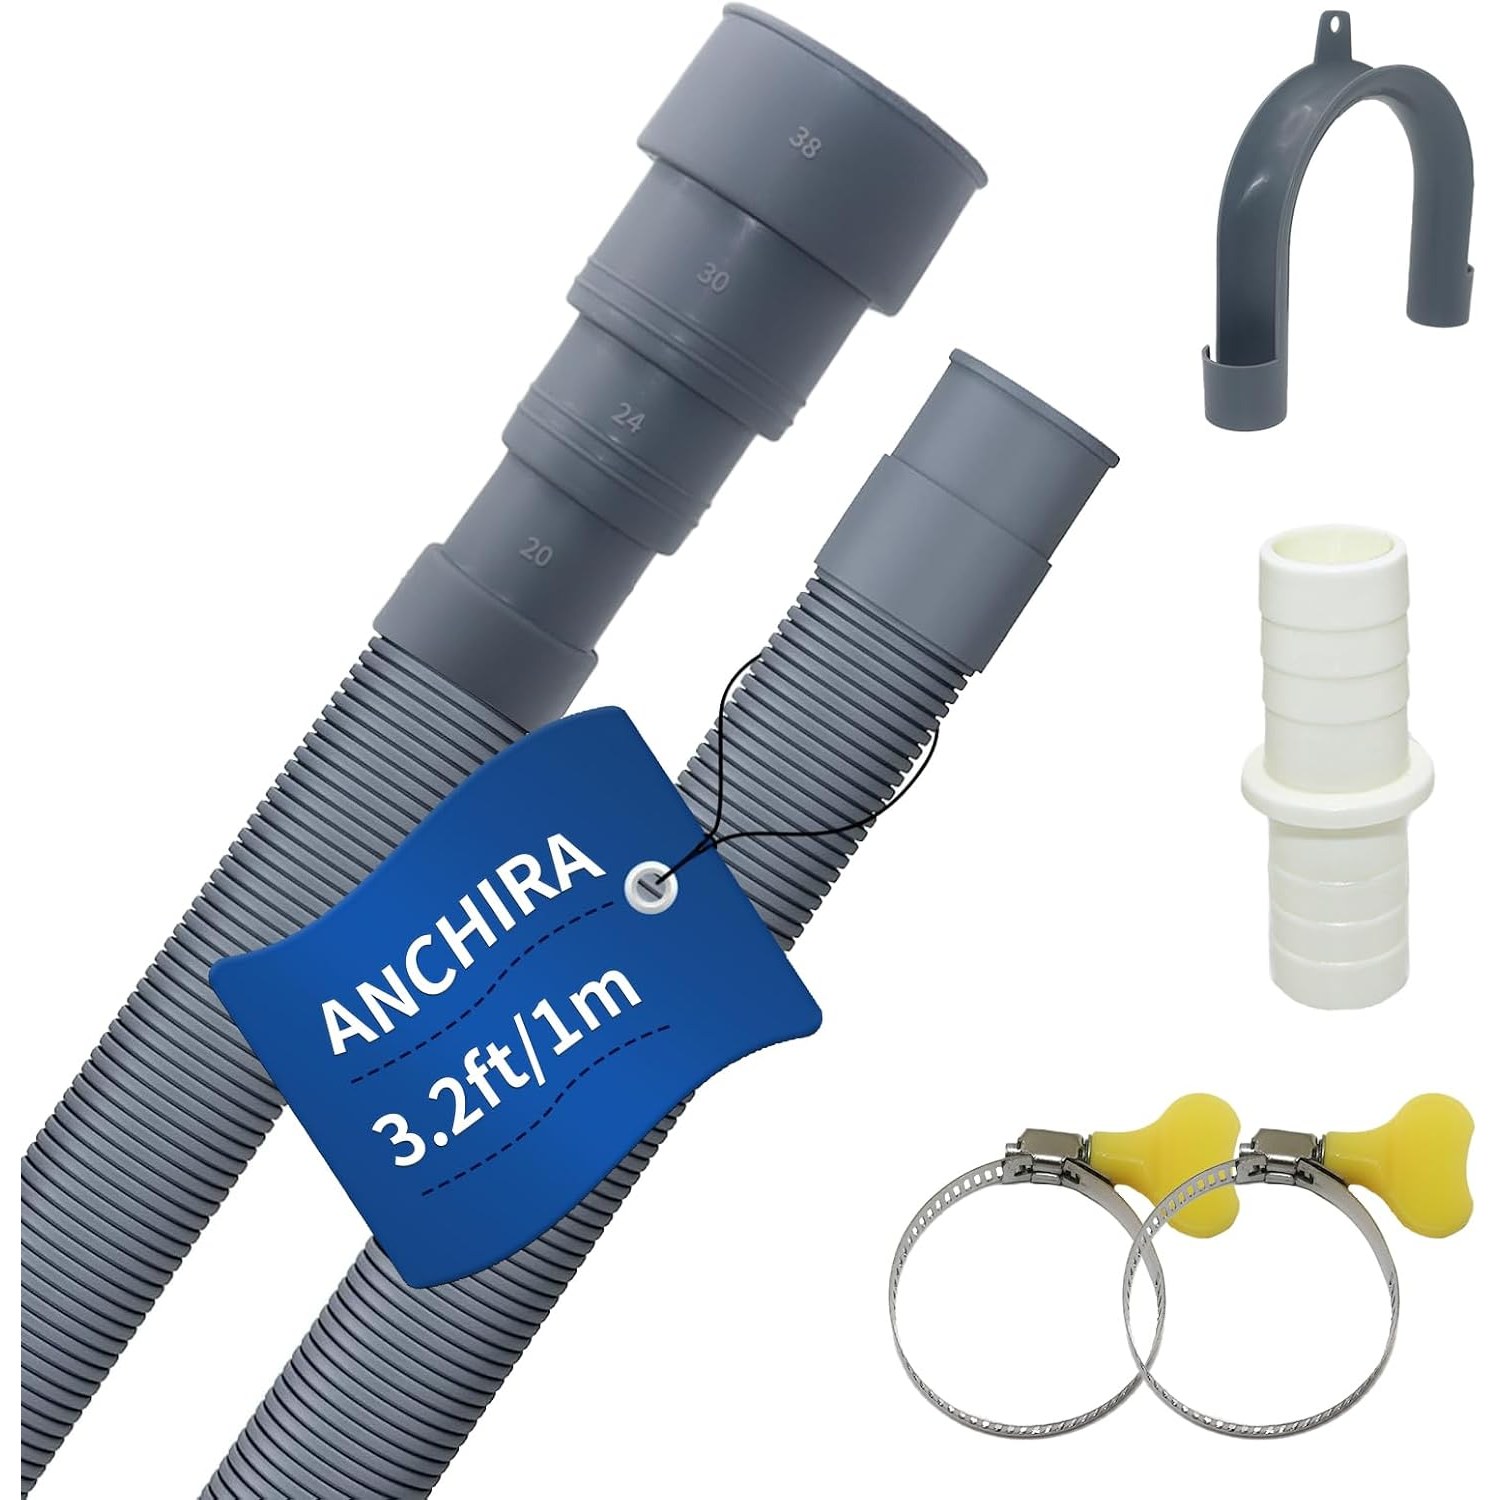
A drain hose extension 1m with bracket fixes the length problem and the mounting problem at the same time. You get the extra reach, a proper barbed adapter to join it, clamps to lock the joint down, and a hook to hold the outlet where it should sit. It is a small pack of parts that does a job properly rather than approximately.
How a drain hose extension actually works
Your appliance has a pump that pushes waste water out through a flexible hose. That hose terminates somewhere, usually a vertical standpipe behind the machine, sometimes a laundry sink, occasionally a floor gully. The pump only has to lift water a modest height, and everything beyond that height is a struggle.
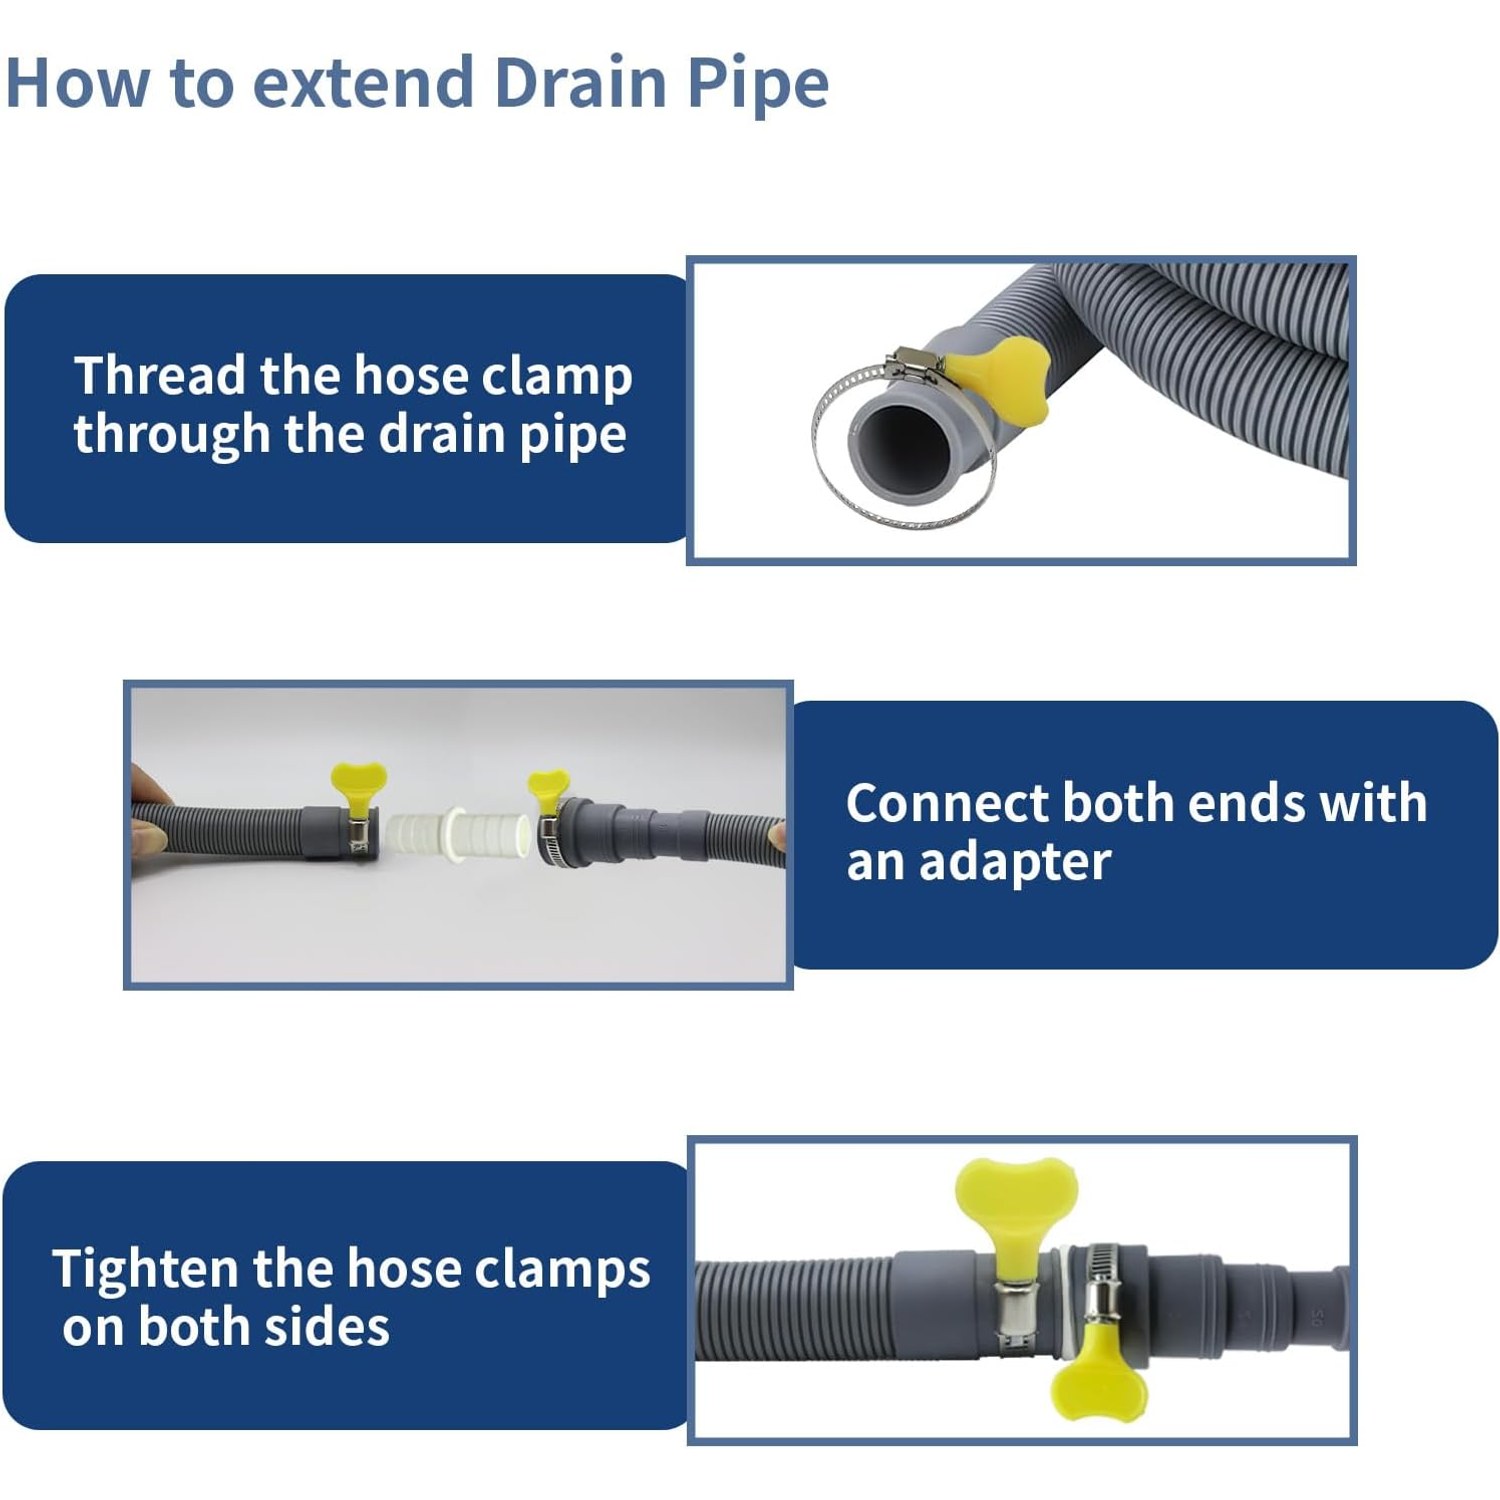
An extension joins a new length of hose to the existing one using an adapter that sits inside both ends. The adapter here is barbed, which means it has a series of small ridges running around it. When you push a hose over barbs, the ridges bite into the inner wall. Pull on the hose and the barbs grip harder. That is why barbed fittings hold so much better than a plain smooth tube.
The clamp goes over the outside of that joint and squeezes the hose down onto the barbs. Two of them come in this kit, sized 18 to 38 mm, one for each end of the adapter. Tighten them with a screwdriver until the plastic is held firmly. There is no need to go further, and over-tightening can distort the hose and actually make a leak more likely.
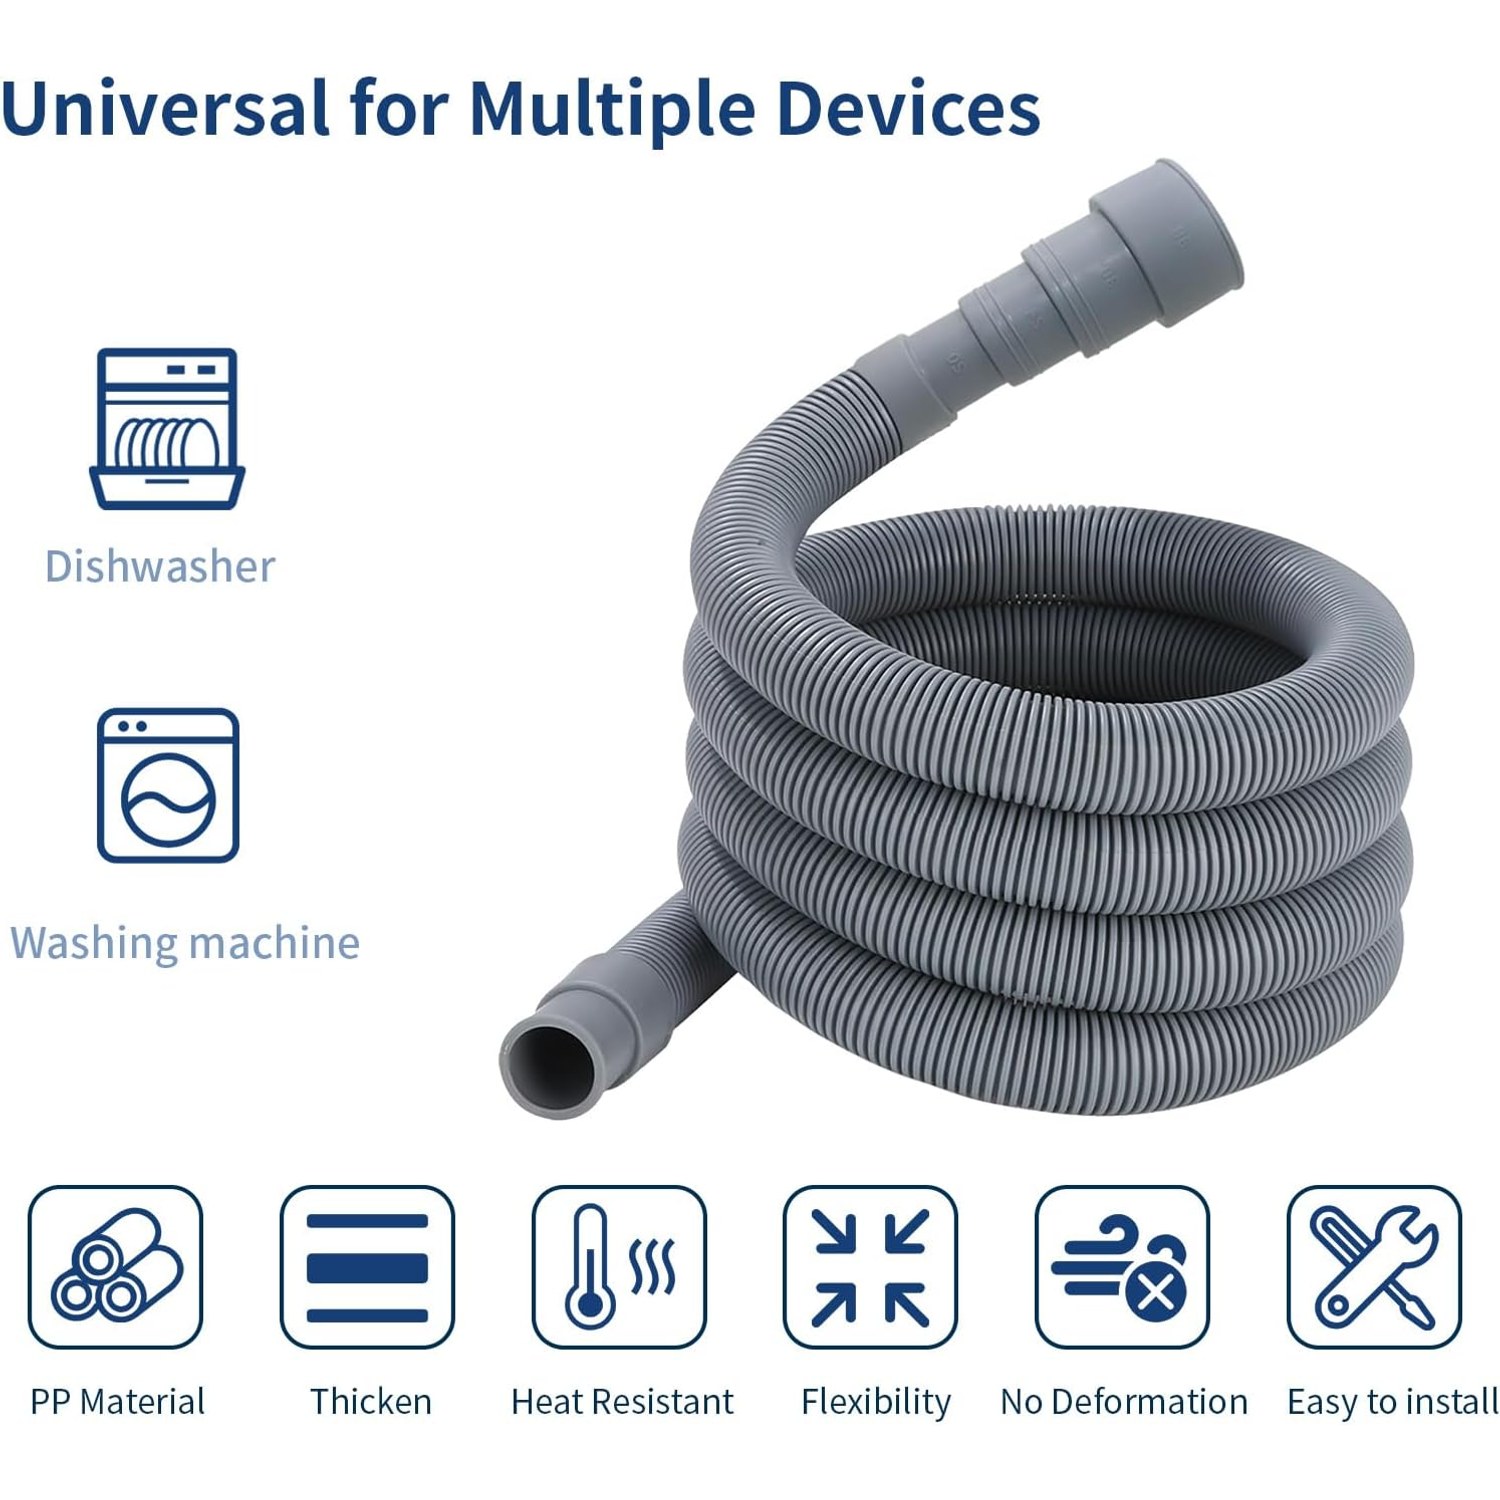
The hose itself is corrugated polypropylene with a nominal 3 mm wall. Corrugation is what lets the hose bend without collapsing, and the wall thickness is what lets it survive a heavy appliance leaning on it. Thin hose goes flat under load and stays flat. This one compresses and springs back.
Who this suits
Anyone extending a washing machine, dishwasher or similar appliance drain line by about a metre. That covers a lot of situations.
People moving house find the new laundry has the drain in a different place from the old one. People renovating a kitchen discover the dishwasher now sits two cupboards along from where it used to. Renters fitting a portable washer into a bathroom need to get the outlet over the edge of a bath. All of those are a one-metre problem.
It also suits anyone who currently has a hose arrangement they are not happy with. If your current extension is held together with tape, or your hose end is wedged into a standpipe and keeps popping out, this kit replaces the improvisation with the parts that were meant to be there.
Where it is not the right answer is a long permanent run. If you need to move waste water three or four metres across a room, you want rigid pipe installed with a proper fall, not a chain of flexible hoses. Flexible hose is for the last short hop.
Getting the size right
This is the part worth five minutes of attention before you order anything.
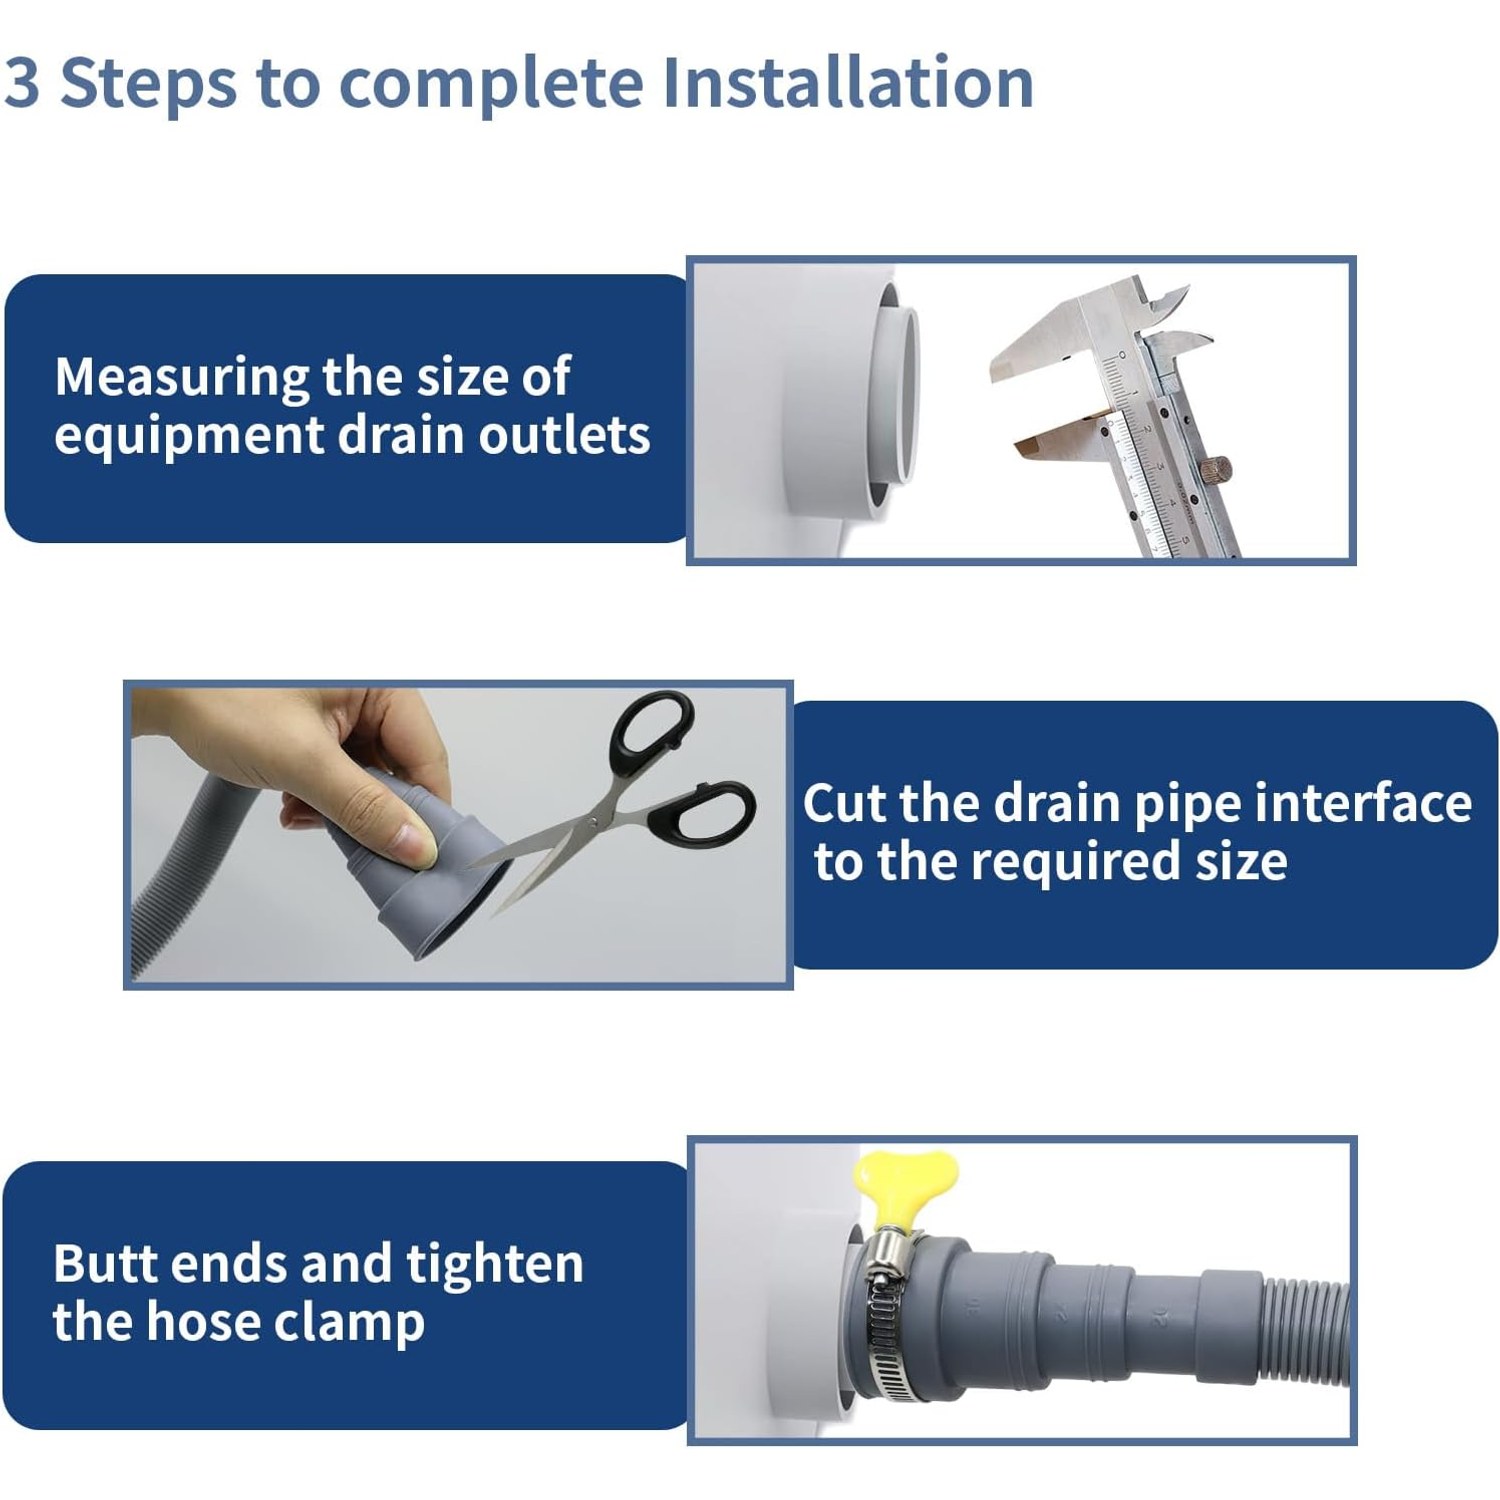
Pull the end of your existing drain hose out and measure the inside diameter. Not the outside, the inside, because that is what sits over the adapter. A tape measure across the opening is usually close enough, though a vernier caliper is better if you have one.
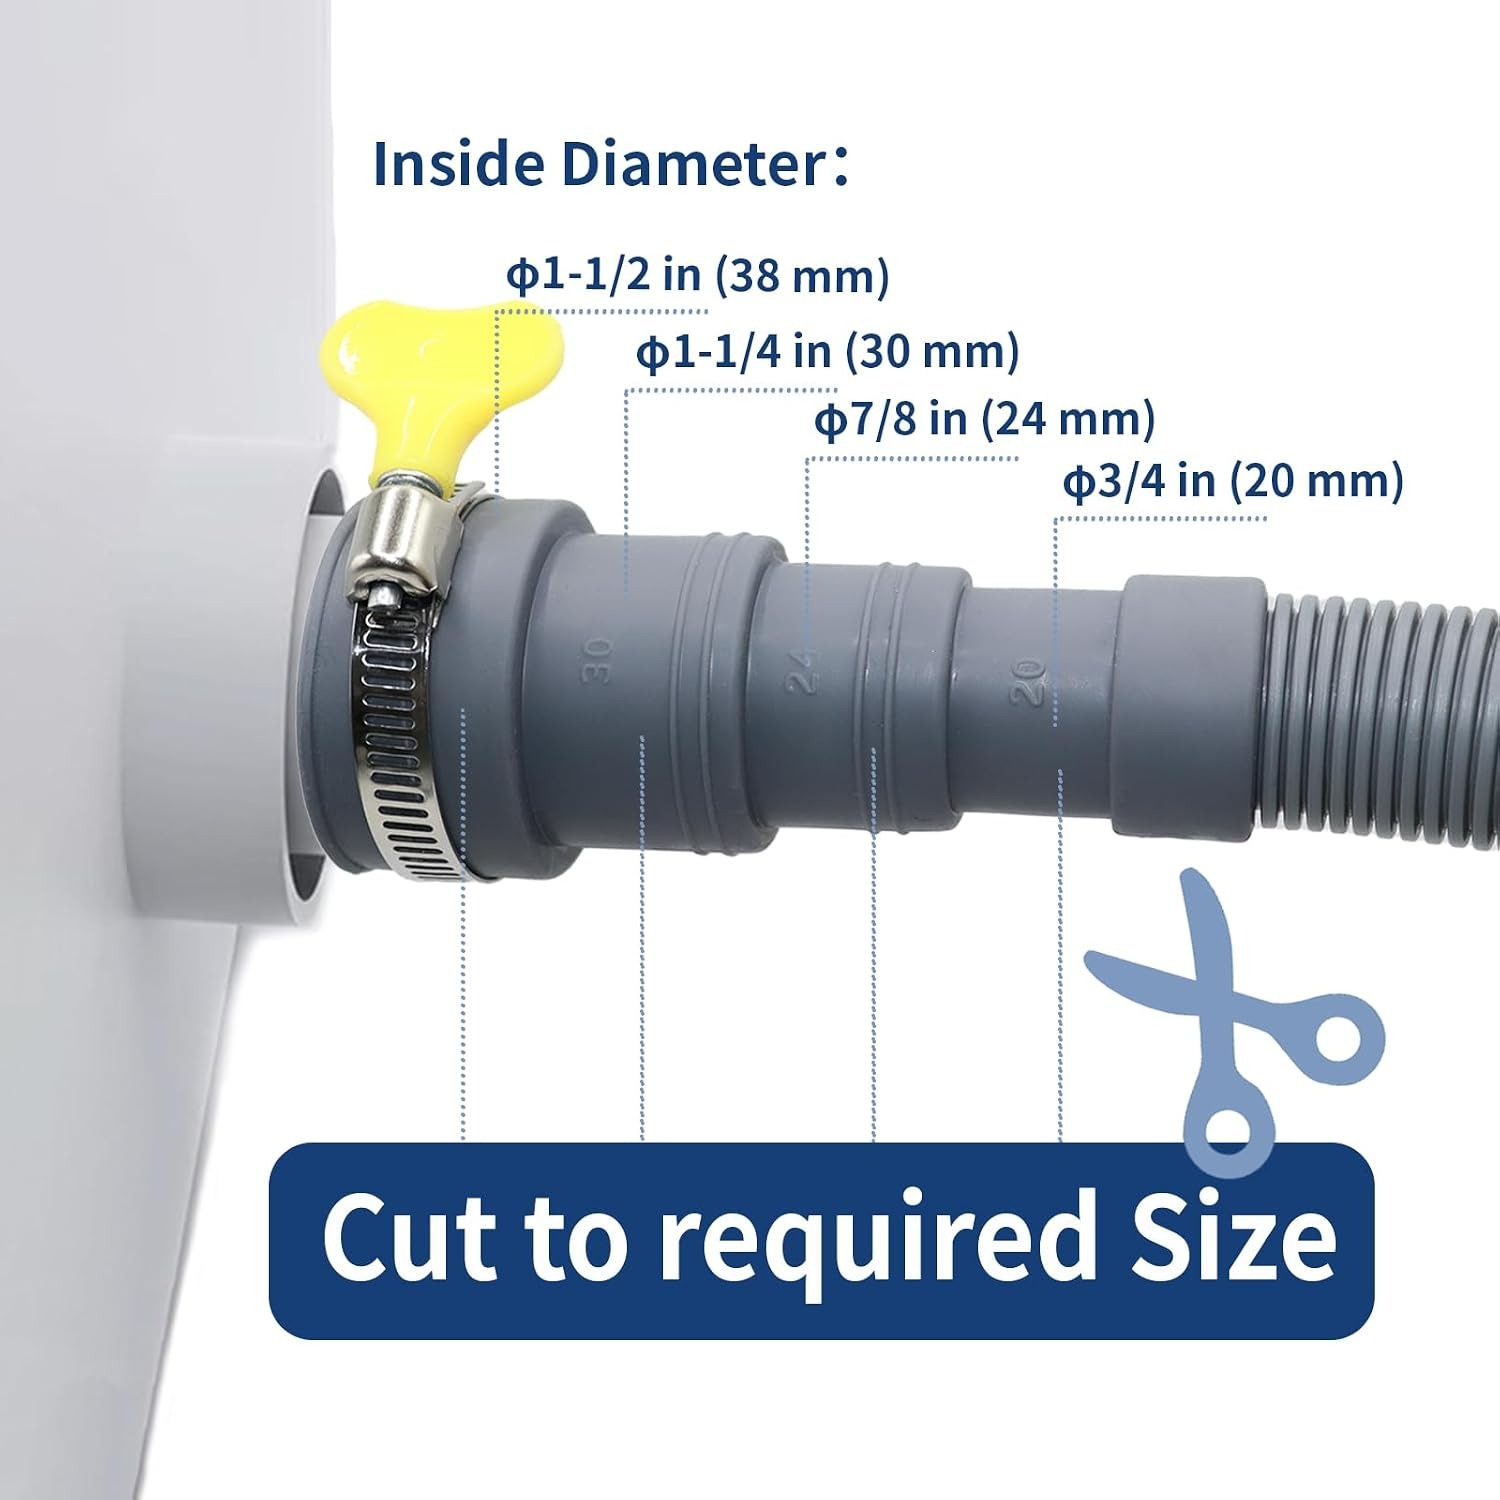
The stepped adapter in this kit covers four inner diameters, 3/4 inch, 7/8 inch, 1-1/4 inch and 1-1/2 inch. It is moulded as a series of shoulders, each one narrower than the last. You identify the step that matches your measurement and cut the adapter cleanly just below it. What you are left with is a fitting sized exactly for your hose.
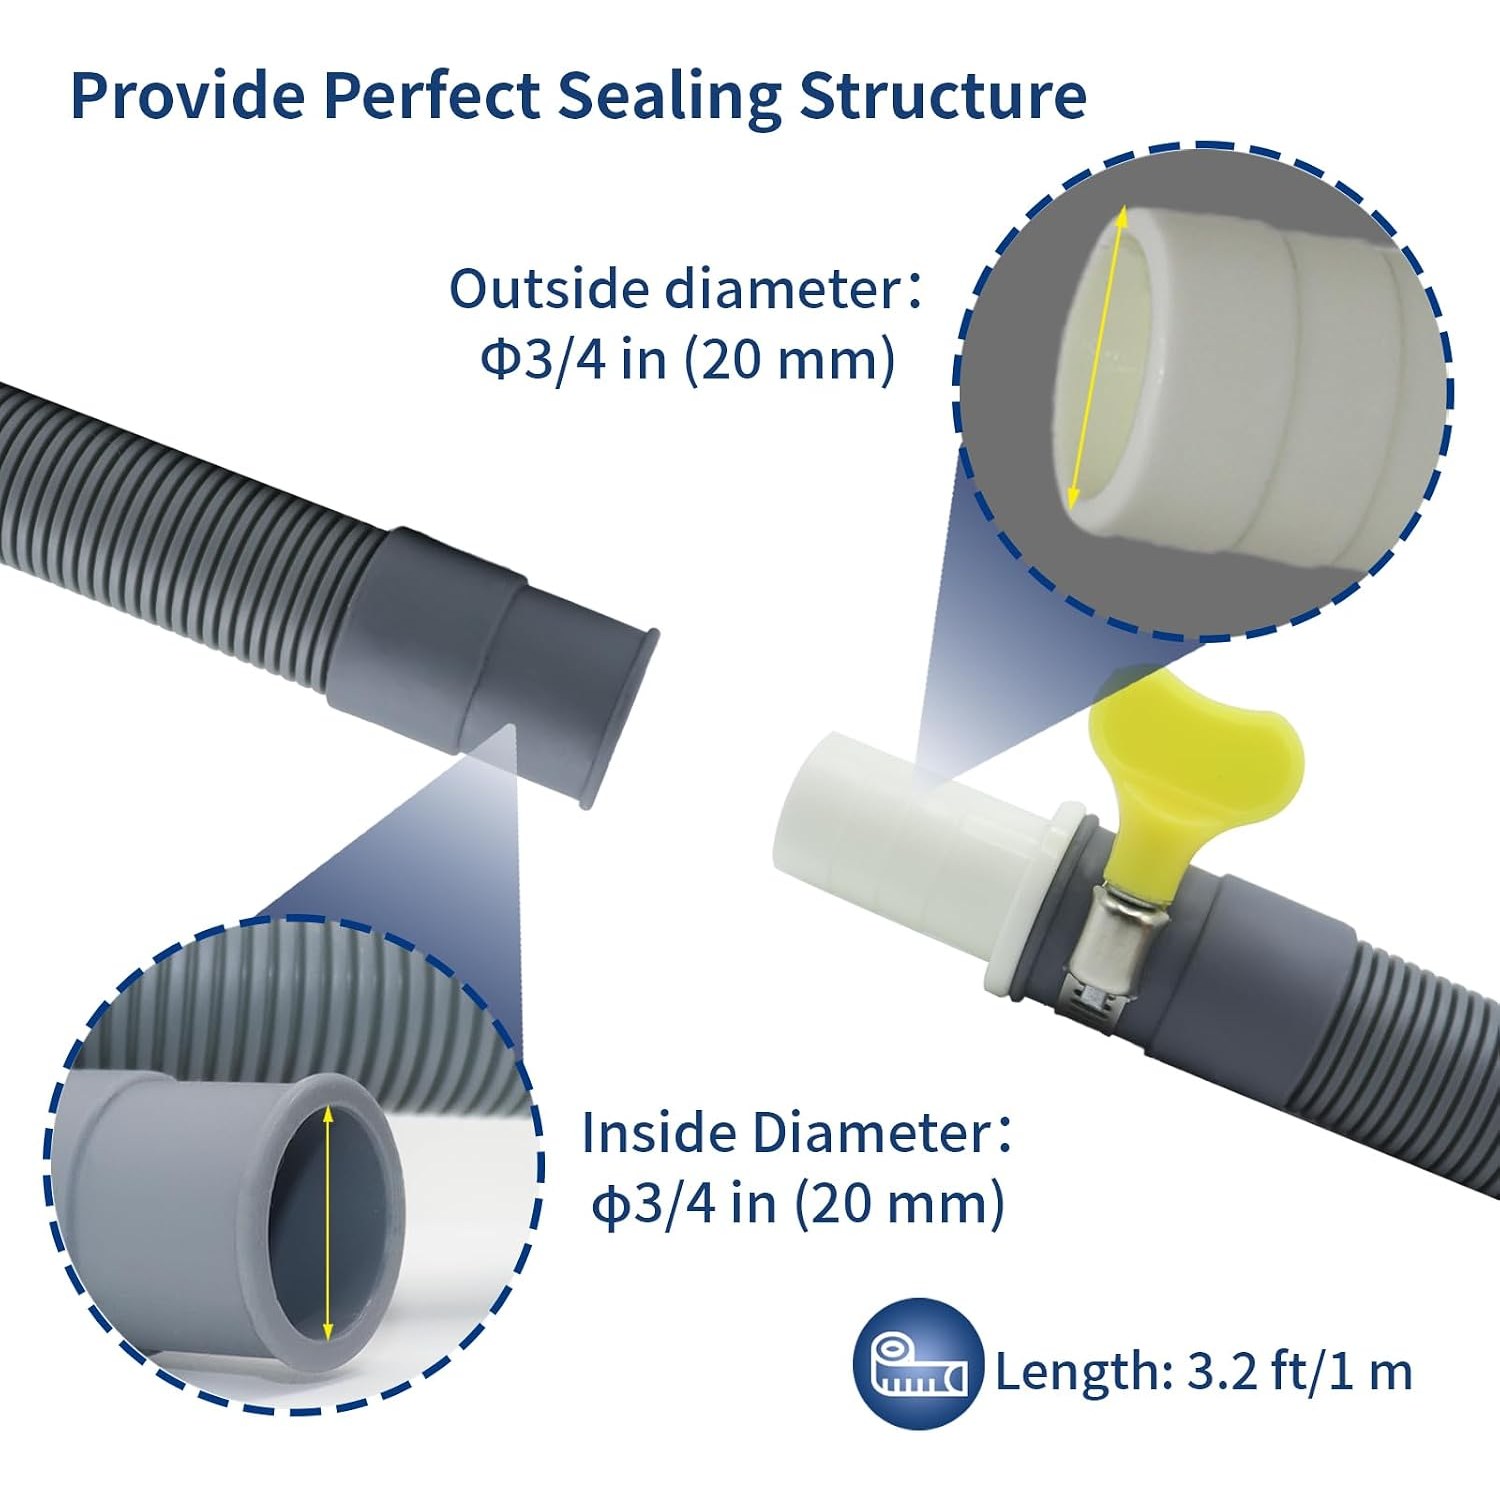
The adapter's outside diameter is 20 mm, which suits pipe with a 20 mm inner diameter. The extension hose shares that 20 mm outside diameter. If your measurement lands outside the four steps, a cheap reducer from a hardware store will usually bridge the gap, but it is better to check first than to find out after you have cut something.
Fitting it without drama
Turn off the appliance and unplug it. Pull it far enough out to work behind comfortably, and put a towel down, because there is always a cupful of water left in the line.
Slide one clamp onto your existing hose and one onto the new extension before you join anything. Everyone forgets this step once and has to take the joint apart again.
Push the trimmed adapter firmly into the existing hose end. A little warm water on the barbs makes it slide more easily. Push the extension hose onto the other side of the adapter the same way. Work both clamps over the joints so they sit over the barbed section, then tighten with a screwdriver.
Hook the U-bend holder over the standpipe, bath rim or bucket edge and feed the hose end into it. The outlet should sit above the waterline of whatever it drains into. This matters. If the end dips below the water, the machine can siphon itself empty during a cycle, which looks like a fault but is really just physics.
Run a short rinse cycle with the machine still pulled out, and watch both joints while the pump is running. Dry joints mean you are done. Push the machine back, keeping the hose in a gentle curve rather than a fold.
Looking after it
Flexible drain hose asks for very little. Flush it through with clean water now and then, especially if your machine sheds a lot of lint. Every few months, reach back and check the clamps have not worked loose, since thermal cycling and vibration slowly loosen any screw fitting.
Keep the run sloping down toward the drain with no dips. A dip holds water, and standing water is where smells come from. If you have spare hose length, cut it off rather than coiling it behind the machine.
Avoid running the hose over a sharp cabinet edge or a screw head. The corrugation is tough but it is still plastic, and a constant rubbing point will eventually wear through. A cable tie holding the hose away from the edge solves it.
If you take the kit apart to move house, keep the clamps with the hose. They are the easiest part to lose and the most annoying to replace.
A few things people get wrong
Running the hose outlet too high is one. Most appliance pumps have a maximum lift, often around a metre, and asking for more than that leaves water in the drum.
Burying the hose in a tight coil behind the machine is another. The water still flows, just more slowly, and the pump runs longer than it should on every cycle.
Using tape instead of a clamp is the classic. Tape looks fine for a week. Then the adhesive softens with warm water, the hose creeps off the barbs, and you find out the hard way at two in the morning.
The short version
This kit gives you a metre of thick-walled corrugated PP hose, a four-step barbed adapter, two stainless clamps sized 18 to 38 mm and a U-bend holder to hang the outlet. It weighs 0.14 kg, comes in grey, and goes together by hand apart from a screwdriver for the clamps.
Measure the inner diameter of your current hose before ordering, cut the adapter to the matching step, clamp both joints and keep the outlet above the waterline. Do those four things and you have a drain that works quietly for years. Get any of them wrong and you have a towel on the floor.